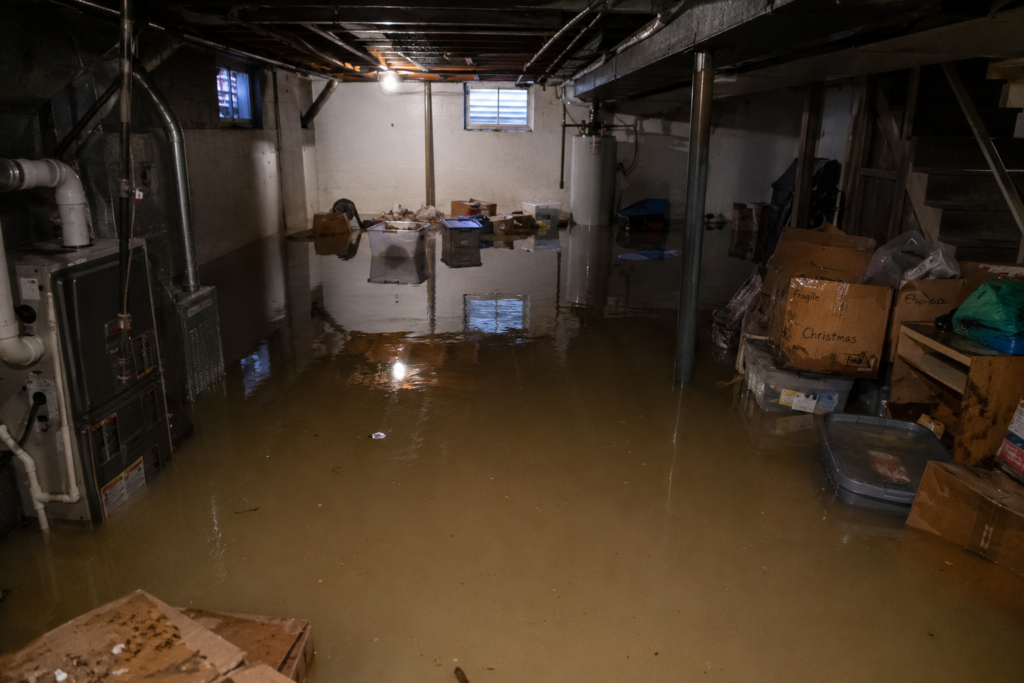
You head downstairs on a Tuesday morning and your foot hits cold water before it hits the floor. Or you come home after a long day to find your finished basement – the one with the carpet, the sectional, and the kids’ playroom – sitting under two inches of standing water.
In Midwest cities, this is not a rare event. It happens every spring. It happens after summer thunderstorms that dump three inches of rain in 90 minutes. It happens in January when a pipe freezes and bursts inside a wall while you’re at work.
What separates a $2,000 cleanup from a $15,000 rebuild is almost always the same thing: how fast you responded, and whether you did it right.
The Most Common Causes of Basement Flooding in Midwest Cities
Understanding why your basement flooded helps you prevent the next one. In Illinois and surrounding Midwest states, four causes account for the vast majority of basement water events.
Sump pump failure. This is the leading cause of basement flooding across Illinois, Indiana, Ohio, and Michigan. Most Midwest homes with finished basements rely on a sump pump to collect groundwater and discharge it away from the foundation. When the pump fails – from a power outage, a burned-out motor, a stuck float switch, or simply age – water that would normally be evacuated accumulates in the pit and overflows onto the basement floor. In flat terrain like much of northern Illinois, there is nowhere for that water to go except across your floor.
Spring snowmelt and saturated soil. Every spring, the accumulated snowpack from a Midwest winter melts faster than the still-frozen ground can absorb it. The result is saturated soil pressing against foundation walls from every direction simultaneously. Even a foundation in good condition faces significant hydrostatic pressure during these events. Older foundations – and the Midwest has millions of them – often can’t hold. Water seeps through cracks, through the cove joint where the floor meets the wall, or directly through porous block foundation walls.
Lateral seepage through foundation walls. Over time, the soil around a foundation settles, grades shift, and landscaping changes. When the ground slopes toward the house instead of away from it, surface water runs directly toward the foundation during rain events. Combined with aging waterproofing membranes that broke down decades ago, lateral seepage is a slow, steady, recurring problem that announces itself loudly after heavy rainfall.
Sewer backup. When municipal sewer systems become overwhelmed during heavy rain – a common occurrence in older Midwest cities with combined stormwater and sanitary sewer systems – sewage can push back up through floor drains and basement toilets. According to the U.S. Environmental Protection Agency, sewer overflows and backups can cause significant property damage and pose serious health risks due to the presence of pathogens in sewage water. This is the most serious category of basement flooding and requires a completely different level of response than clean water events.
The First 24 Hours: What to Do and What NOT to Do
The decisions you make in the first hour after discovering a flooded basement have a larger impact on the outcome and the total cost than almost anything that happens afterward.
Do: Cut power to the affected area before entering. Water and electricity are an immediately life-threatening combination. If your electrical panel is in the basement and you cannot cut power without entering, call your utility company first. Do not walk into standing water in a space with active electrical circuits under any circumstances.
Do: Stop the source if it’s safe to do so. If the water is coming from a broken supply line or a failed appliance, shutting off the main water supply stops the inflow immediately. If it’s groundwater coming through the foundation, there is nothing you can do to stop the source – focus on documentation and getting a professional on-site.
Do: Document everything before touching anything. Take photos and video of every affected area, the water level, the source if visible, and all damaged belongings. Do this before you move anything. Insurance claims are substantially stronger with pre-cleanup documentation in hand.
Do: Move valuables, electronics, and irreplaceable items to dry ground. Get them out of the water as fast as possible. After that, stop and call a professional.
Do NOT: Run a shop vac for hours thinking you can handle it yourself. A shop vac handles a small puddle. It cannot handle structural drying. The problem with a flooded basement is never just the visible water – it’s the moisture that has wicked into drywall, insulation, subfloor material, and wood framing. Without instruments to measure that hidden moisture and industrial equipment to extract it, you are leaving the conditions for mold growth in place behind your walls.
Do NOT: Use fans and open windows as your primary drying strategy. In humid Midwest summer conditions, bringing in outdoor air often adds more moisture to a space than it removes. Professional drying is a controlled, closed-environment process – it requires active dehumidification, not just airflow.
Do NOT: Tear out drywall or flooring before documentation. If you plan to file an insurance claim, removing materials before an adjuster or restoration company documents the damage may reduce your settlement. Photograph and document everything first, then get a certified company on-site before demolition begins.
The Professional Extraction and Drying Process Explained
When a certified restoration crew arrives, they follow a structured process governed by the IICRC S500 standard. Here is what that process looks like in practice, step by step.
Step 1: Moisture mapping. Before any equipment is placed, technicians use thermal imaging cameras and calibrated moisture meters to map the full extent of water intrusion. This includes checking inside wall cavities, behind baseboards, beneath flooring assemblies, and inside built-in cabinetry. The goal is to define the complete affected area – not just what is visibly wet.
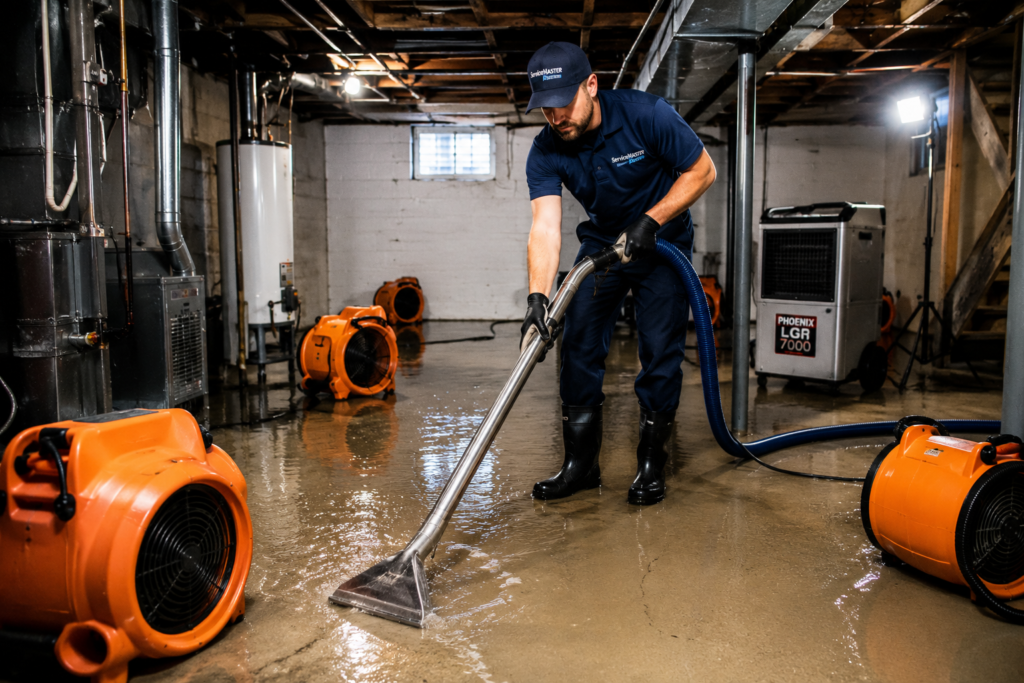
Step 2: Water extraction. Our emergency water extraction service uses truck-mounted or high-capacity portable extraction units to remove standing water from the space. A professional extractor moves vastly more volume than any consumer-grade equipment – a truck-mounted unit can pull hundreds of gallons per hour. This step also includes extraction from carpet and padding if present, though in most Category 2 and 3 events, carpet and pad are removed and disposed of rather than dried in place.
Step 3: Material removal where required. Wet drywall, insulation, baseboards, and flooring that cannot be effectively dried in place are removed to expose the structural framing. This is called flood cutting – typically a 12 to 24-inch horizontal cut above the waterline – and it looks destructive but is the correct approach. Wet insulation cannot be dried in place. Wet drywall paper is a primary food source for mold. Removing these materials and drying the exposed framing is faster, cheaper, and safer than attempting to dry through finished surfaces.
Step 4: Structural drying. Industrial LGR (Low Grain Refrigerant) dehumidifiers and high-velocity air movers are placed throughout the space in a calculated configuration. Our structural drying process is designed to create a controlled drying environment – the dehumidifiers pull moisture from the air as it evaporates from building materials, and the air movers accelerate surface evaporation. This equipment runs continuously for three to five days, with technicians returning daily to take moisture readings and adjust equipment placement.
Step 5: Antimicrobial treatment. All affected structural surfaces receive application of EPA-registered antimicrobial agents to inhibit mold growth during the drying period. This step is non-negotiable in Category 2 and Category 3 events.
Step 6: Clearance testing and drying log. Before the job is closed, moisture readings in all affected materials must reach the target dry standard for that material type in that climate. A professional job produces a written drying log documenting daily readings from initial assessment to final clearance – documentation that matters for your insurance claim and your own peace of mind.
Mold Risk Timeline After Basement Flooding
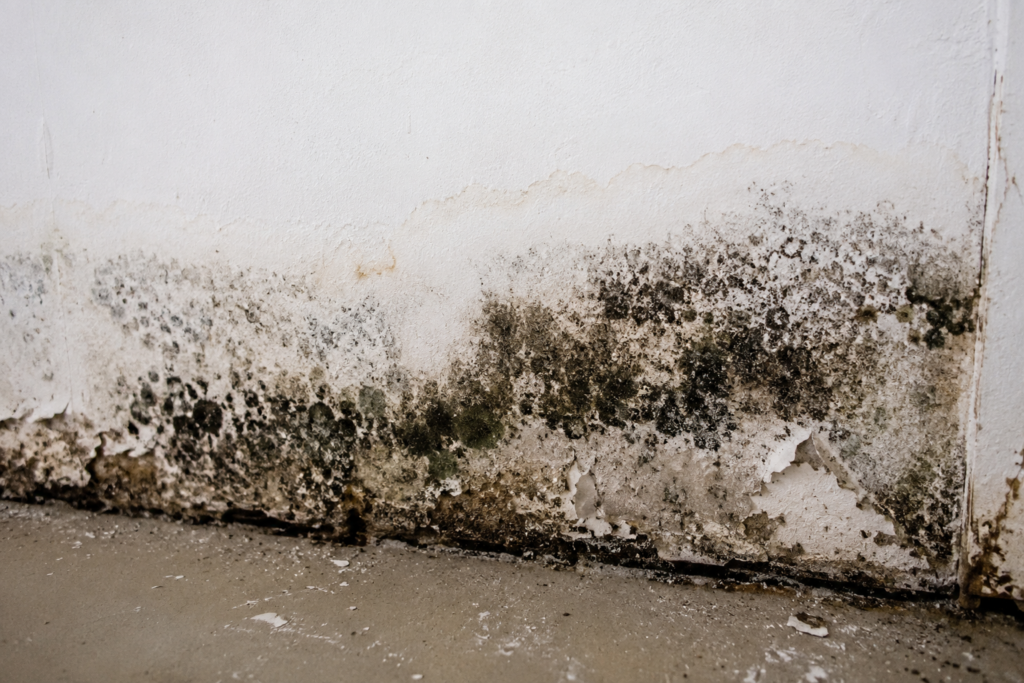
This is the number every Midwest homeowner needs to understand: mold can begin colonizing wet building materials in as little as 24 to 48 hours under the right conditions. In a warm, humid Illinois basement in July, that window is closer to 24 hours. In a cold basement in February, you may have 48 to 72 hours before conditions turn favorable for growth.
After 72 hours of unaddressed moisture, the probability of mold behind walls and under flooring rises sharply. After one week of unresolved dampness, visible surface mold is common. After two weeks, mold remediation becomes a separate scope of work – separate cost, separate crew, and a significantly larger project than what a simple extract-and-dry would have been on day one.
If mold is discovered during or after water damage restoration, our mold remediation services are handled in-house by the same IICRC-certified team – no handoff to a subcontractor, no scheduling gap. Early response to water damage is the single most effective mold prevention strategy available.
The math on calling a professional immediately versus waiting to see if things dry out is not close. Early response is dramatically cheaper in nearly every scenario.
When DIY Cleanup Is Dangerous
Most homeowners can safely manage a very small, clean water spill – a slow appliance leak caught quickly, a minor overflow on a bare concrete floor. But there are several basement flooding scenarios where DIY cleanup is not just ineffective – it is genuinely dangerous.
Sewage backup. If your flooding involved a floor drain backup, a toilet overflow, or any event where sewage entered the space, this is a biohazardous environment. Category 3 black water contains bacteria, viruses, and parasites that pose real health risks through skin contact, inhalation of aerosols, and accidental ingestion. Proper remediation requires full PPE, containment procedures, and disposal protocols that no homeowner is equipped to execute safely or legally in a residential setting.
Structural concerns. If you notice bowing or cracking in foundation walls, if floors feel soft or unstable underfoot, or if you see signs that the structure has shifted, do not occupy the space until it has been evaluated by a structural engineer. Hydrostatic pressure events can compromise foundation integrity in ways that aren’t visually apparent from inside.
Active electrical hazards. Even after cutting power at the panel, water in contact with wiring, outlets, or electrical panels creates residual hazards. A licensed electrician should evaluate the space before it is considered safe to re-occupy and work in.
Asbestos-containing materials. Homes built before 1980 – which describes a large portion of Midwest housing stock – may contain asbestos in floor tiles, pipe insulation, ceiling tiles, or joint compound. Disturbing these materials during flood cleanup without proper testing creates an airborne hazard. A reputable restoration company will identify potential asbestos-containing materials before any demolition begins and bring in a licensed abatement contractor if testing confirms their presence.
How to Vet an Emergency Cleanup Company in Your Area
When water is on your basement floor, the pressure to call whoever picks up first is real. But five minutes of vetting before you authorize work can prevent you from hiring an unqualified operator who leaves hidden moisture in your walls and walks away.
Ask these questions before you commit:
Are your technicians IICRC WRT or ASD certified? These are the baseline credentials for water damage work – Water Damage Restoration Technician (WRT) and Applied Structural Drying (ASD). Ask for the technician’s certification number. It can be verified at the IICRC’s public registry at iicrc.org.
Do you use moisture meters and thermal imaging on every job? If the answer is no, or if they seem unfamiliar with the question, move on. Visual assessment alone misses the hidden moisture that causes mold.
Will you provide a written scope of work before starting? Every line item – extraction, equipment placement, antimicrobial treatment, material removal, debris disposal – should be in writing before any work begins. No exceptions.
Do you document daily moisture readings? A legitimate job produces a drying log. No log means no verifiable proof that the job was completed to industry standard.
Do you work directly with insurance carriers? A professional company will communicate with your adjuster and provide documentation in the format your insurer requires. Ask specifically about Xactimate-formatted estimates, which most carriers accept and prefer.
Homeowners in Rockford, IL can reach a local specialist at rockfordilwaterdamage.com for rapid basement water extraction – IICRC-certified, same-day response across Winnebago County, with full moisture documentation and direct insurance coordination on every job.
For homeowners across Illinois and the broader Midwest, use the IICRC’s firm locator at iicrc.org to find certified companies in your specific area.
Act Fast – Every Hour Counts
A flooded basement in the Midwest is serious, but it is manageable – if you respond fast and respond correctly. Cut power, document the damage, stop the source if you can, and get a certified restoration crew on-site within hours, not days.
If you’re in the Harmon area, our team is available around the clock. Contact us today for a free assessment – we’ll be on-site the same day, instruments in hand, ready to document and begin extraction immediately.
Don’t let hope push you into waiting to see if things dry out on their own. In a Midwest basement, they won’t.
This guide is intended for general informational purposes. Flooding situations vary significantly based on water category, affected materials, and structural conditions. Always prioritize personal safety and consult a certified professional for a property-specific assessment.
Leave a Reply